

A harvester is an essential piece of equipment on the farm, enabling efficient and timely harvesting of various crops. However, after each use, proper cleaning is crucial to maintain its performance, extend its lifespan, and ensure the quality of future harvests. As a reputable harvester supplier, I am here to share some comprehensive guidelines on how to clean a harvester after use.
Pre - cleaning Preparation
Before you start the actual cleaning process, it's important to take some preparatory steps. First, park the harvester in a well - ventilated and flat area. Make sure the engine is turned off, and all moving parts have come to a complete stop. Allow the harvester to cool down if it has been running for an extended period. This not only prevents burns but also reduces the risk of damage to the cleaning equipment due to high temperatures.
Next, gather all the necessary cleaning tools and materials. You will need a pressure washer, brushes of different sizes (including stiff - bristled brushes for stubborn dirt and soft - bristled brushes for delicate parts), a hose, cleaning agents suitable for agricultural machinery, and safety gear such as gloves and goggles.
Cleaning the Exterior
The exterior of the harvester is the first area to be cleaned. Use a pressure washer to remove large debris such as dirt, mud, and plant residues. Start from the top and work your way down, ensuring that you cover all surfaces, including the cab, the frame, and the side panels. Pay special attention to areas where debris tends to accumulate, such as around the wheels and the undercarriage.
For areas that are difficult to reach with the pressure washer, use a brush. A stiff - bristled brush can be used to scrub off stubborn dirt on the frame and the wheels. If there are any sticky substances, apply a suitable cleaning agent and let it sit for a few minutes before scrubbing. Rinse the exterior thoroughly with clean water to remove all the cleaning agents and loosened debris.
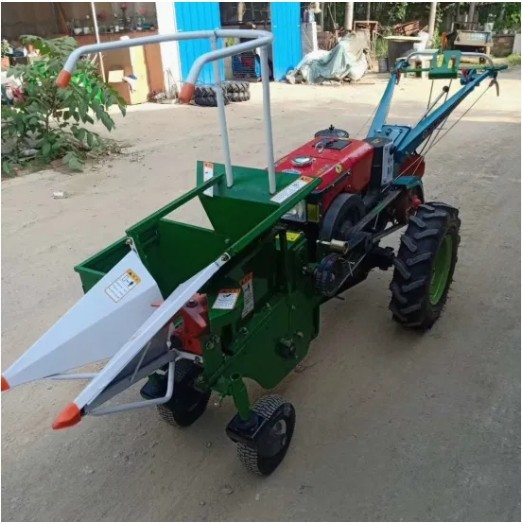

Cleaning the Harvesting Components
The harvesting components, such as the header, the cutter bar, and the threshing mechanism, are the most critical parts of the harvester. These components come into direct contact with the crops and are prone to clogging and damage if not properly cleaned.
Header and Cutter Bar
Start by removing any remaining crop material from the header and the cutter bar. Use a brush to gently sweep away loose debris. For more stubborn residues, use a cleaning agent specifically designed for agricultural cutting tools. Apply the cleaning agent to the cutter bar and let it soak for a few minutes. Then, use a soft - bristled brush to scrub the blades, being careful not to damage the cutting edges. Rinse the header and the cutter bar thoroughly with water.
Threshing Mechanism
The threshing mechanism is responsible for separating the grain from the straw. It can accumulate a large amount of dust, chaff, and small pieces of grain. Use a compressed air gun to blow out loose debris from the threshing chamber, concave, and rotor. Then, use a vacuum cleaner to remove any remaining fine particles. For more thorough cleaning, you may need to disassemble some parts of the threshing mechanism according to the manufacturer's instructions. Clean each part separately with a brush and a suitable cleaning agent, and then reassemble them carefully.
Cleaning the Grain Handling System
The grain handling system, including the elevator, the augers, and the grain tank, also requires proper cleaning. Residual grain in the system can attract pests and cause mold growth, which can affect the quality of future harvests.
Elevator and Augers
Use a brush to remove any grain residues from the elevator and the augers. If there are any blockages, use a long - handled tool to clear them. You can also use a compressed air gun to blow out loose grain particles. Apply a light coating of lubricant to the moving parts of the elevator and the augers to prevent rust and ensure smooth operation.
Grain Tank
Empty the grain tank completely. Use a pressure washer to clean the inside of the tank, removing all dirt, dust, and remaining grain. Pay attention to the corners and the seams of the tank. After rinsing, dry the tank thoroughly to prevent moisture - related problems.
Cleaning the Engine and Hydraulic System
The engine and the hydraulic system are the power sources of the harvester. Keeping them clean is essential for their proper functioning and longevity.
Engine
First, remove the air filter and clean or replace it according to the manufacturer's recommendations. Use a brush to clean the engine compartment, removing any dirt, dust, and debris. Be careful not to get water on the electrical components. If necessary, use a degreaser to clean the engine block, but make sure to rinse it thoroughly with water to prevent damage to the engine.
Hydraulic System
Check the hydraulic fluid level and the condition of the hydraulic hoses. If there are any leaks or signs of damage, repair or replace the hoses immediately. Use a clean cloth to wipe the hydraulic components, removing any dirt and oil residues.
Final Inspection and Maintenance
After cleaning, conduct a final inspection of the harvester. Check for any signs of damage, such as loose bolts, worn - out parts, or leaks. Tighten any loose bolts and replace any damaged parts. Lubricate all moving parts according to the manufacturer's lubrication schedule.
Store the harvester in a dry and protected area. If possible, cover it with a tarp to prevent dust and moisture from accumulating.
Conclusion
Proper cleaning of a harvester after use is a time - consuming but necessary task. By following these guidelines, you can ensure that your harvester remains in good working condition, which will save you money on repairs and replacements in the long run.
At our company, we offer a wide range of high - quality harvesters, including the Cheap potato harvester for walking tractor, the Front Type Corn Harvester, Single Row, and the Power Tiller Corn Harvester. If you are interested in purchasing a harvester or have any questions about harvester maintenance, please feel free to contact us for further discussion and negotiation.
References
- Agricultural Machinery Maintenance Handbook
- Manufacturer's manuals of various harvesters
